Leather car seats lend your vehicle a luxurious edge but are notoriously challenging to keep clean. Spilling a coffee or scuffing your seats can have serious (and expensive) consequences. Not to mention, you can’t just use any cleaner with your leather seats, or you risk causing more damage.
If you’re unsure how to clean leather car seats, this guide will tell you everything you need to know.
What Happens When Leather Gets Dirty?
When leather gets dirty, oils in the material bind to water molecules and foreign substances. When this mixture dries and evaporates, the water draws oil out of the leather, leaving it brittle and flaky.
In addition, water and dirt can activate dyes in the leather, causing staining and streaks that can be nearly impossible to remove. If your leather seats absorb too much water and don’t dry quickly enough, they can even begin to rot.
Common Reasons Your Leather Car Seats May Become Dirty
Knowing what factors cause damage to your leather seats can help you better protect your vehicle. Here are a few things to look out for.
Exposure to Sunlight
When leather becomes exposed to sunlight, its colour fades and texture dries, resulting in an aged and worn appearance. Prevent your seats from drying and crusting by parking your car in a shaded area or using window covers to keep sunlight from seeping in.
Body Heat
As we’ve mentioned, getting your leather seats wet can cause significant damage – the same goes for transferring sweat. If you sweat on your leather seats, dry them immediately to prevent stains and flaking.
Changes in Temperature
Extreme heat can change your leather seats’ molecular structure, causing them to become discoloured and dry. Because reupholstering damaged seats can cost a fortune, you’re better off parking in shady areas or using heat protectors.
Spills and Stains
Let’s face it, you’ll probably spill a drink or two in your lifetime, and your leather seats will bear the brunt of it. Thankfully, using leather-grade restoration kits and cleaners immediately can prevent significant or permanent damage.
Improper Cleaning Materials
Regular cleaners are usually not compatible with leather seats. In fact, harsh chemicals and non-leather cleaners can damage your seats even further. Always wash your seats with cleaners made specifically for leather materials.
Environmental Causes
Natural disasters like hurricanes and hail storms can cause significant damage to your vehicle. Shattered or nicked glass can let water seep in, ruining your leather seats.

Cleaning Your Leather Car Seats
Here’s a step-by-step guide to cleaning your leather car seats:
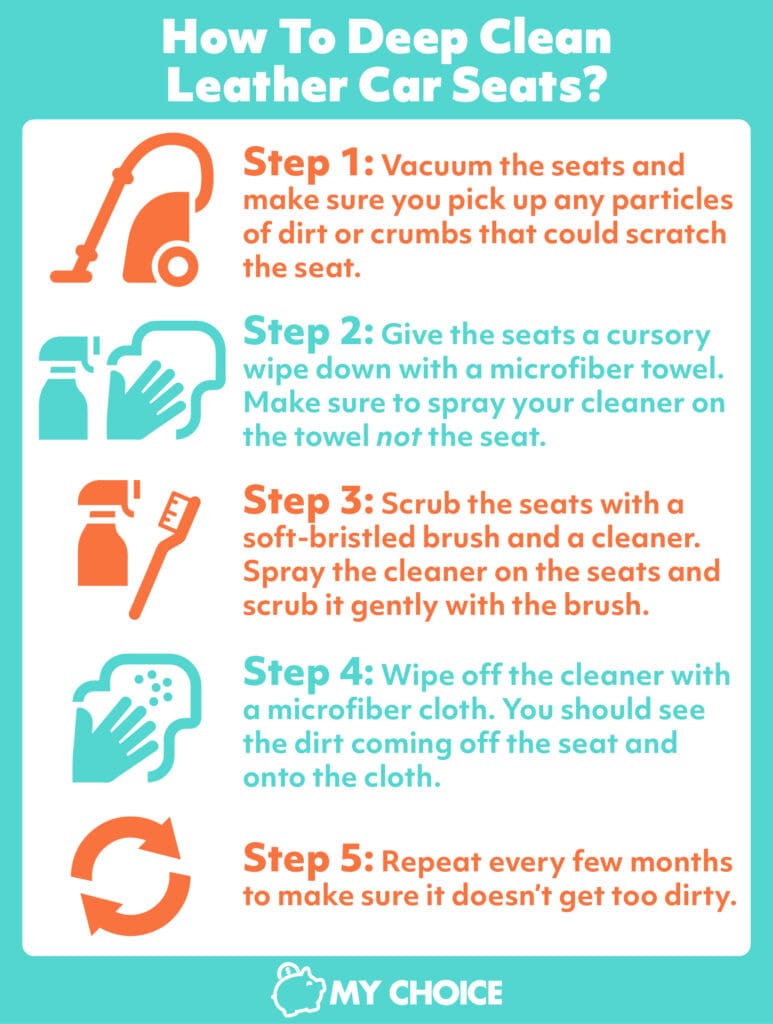
1. Remove Debris
If you tend to leave loose items in your car, get these out of the way before you start cleaning. Removing trash and other obstacles can help you see any potential dirt or grime you’ll have to clean later. If removing car parts, clean them before you reinstall them.
2. Vacuum
Use a handheld vacuum with a dust brush extension to suck up any dirt and debris in your car. Ensure you go over every crack and crevice where dust and crumbs gather.
Avoid using your vacuum’s regular attachment, as this can cause tearing and scratches.
3. Use a Leather Cleaner
When your seats are free of dust and debris, test your cleaning solution. Even if your leather cleaner is safe for use with your particular vehicle, trying it on a small, hidden part of your car is a good way to avoid accidentally damaging your seats. Avoid commercial cleaners at all costs, as these contain harsh ingredients like bleach and ammonia, compounds that quickly break leather down.
Let the cleaner sit for at least five minutes. Look out for reactions like fizzing and melting – if you spot these, wipe the cleaner off immediately.
If there is no reaction, review your cleaner’s manual before applying it to the rest of your seats. Work in small sections to prevent the cleaner from sitting too long.
Avoid using the cleaner directly on the leather if your seats have holes or other perforations. Instead, apply it onto a microfiber towel first, then work the solution into a later to prevent potential damage. If you don’t have a microfiber towel, you can use a gentle bristle brush to apply the solution.
4. Wipe It Down
Once your seats are fully lathered, wipe everything down with a damp towel. A wet towel can remove any excess dirt and grime that may have surfaced after applying the cleaner.
Follow up your wipe-down by drying your seats with a microfiber towel – this will remove excess moisture from the surface. Ensure that your seats are dry, as leaving them moist can lead to the development of mold or mildew.
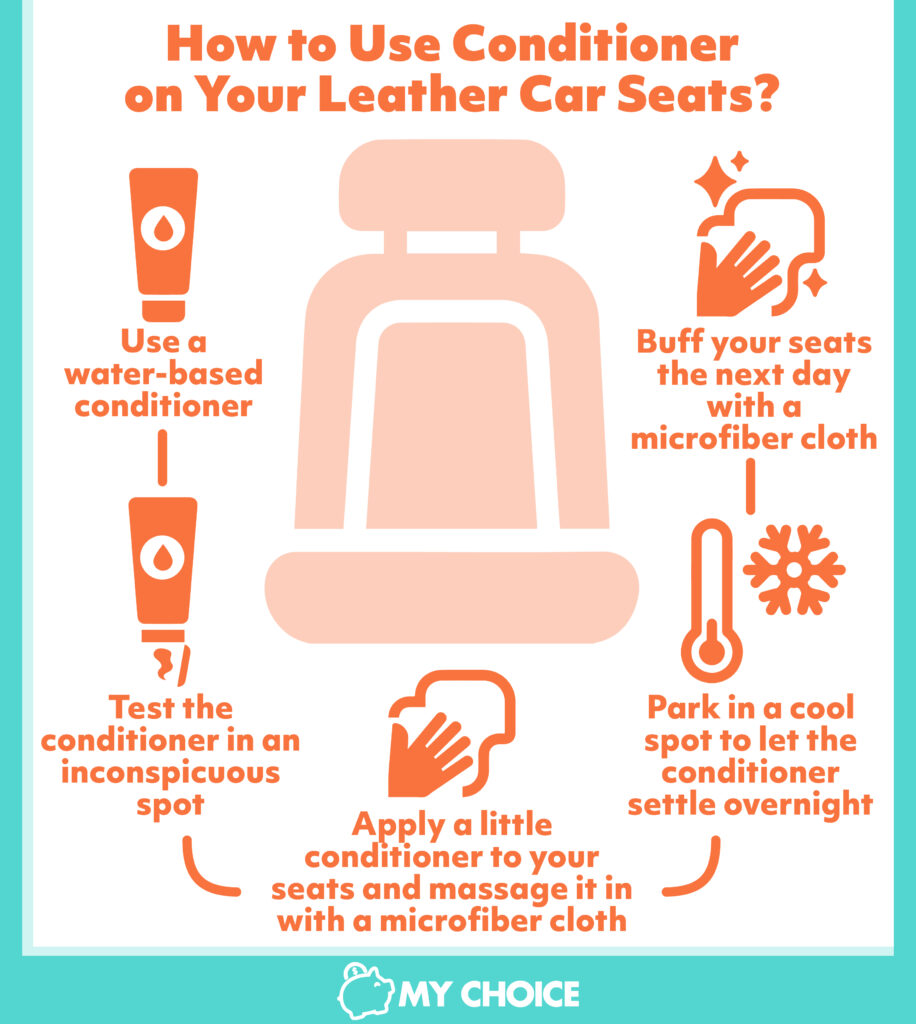
5. Use a Leather Conditioner
While using a leather conditioner once every three months isn’t absolutely necessary, doing so can keep your seats moisturized, protect against UV rays, and prevent cracks, stains, and tears.
Apply the leather conditioner using a microfiber towel, working it into your seats in small, circular motions. Allow the conditioner to air dry for at least an hour.

Tips for Cleaning Dirty Leather Seats
Cleaning your leather seats for the first time can be intimidating, but these tips can make the process easier.
Use DIY Cleaners
If you can’t get your hands on expensive leather cleaners, DIY recipes will suffice. Consider the following:
| Ingredients | Best For |
|---|---|
| Warm water and Castile soap (5:1 ratio) | General cleaning |
| Non-gel toothpaste | Removing scuffs and stains |
| Lemon juice and cream of tartar (1:1 ratio) | Removing stains |
| Rubbing alcohol | Removing stains |
| Baking soda | Absorbing oil and excess moisture |
Know What Kind of Leather You’re Cleaning
Each type of leather requires various cleaning methods. For example, smooth vegetable-tanned leather absorbs water quicker than grained or patterned leather, so you’ll want to dry this as fast as possible. Leather materials like suede don’t fare well with a protective wax and may require a spray instead.
Use Seat Covers
Consider using seat covers if you can’t park in a shaded area. These can protect your seats, especially if you haul heavy objects regularly.
Consult Your Dealership for Advice
Do you need professional help with cleaning your leather seats? Consult your dealership for tips, because they likely know more about how to care for your car’s leather seats.
Choose Leather Cleaners Carefully
There are many things to look for in a leather cleaner, such as:
- Ingredients: Ensure the product is free of harsh chemicals and contains gentle, natural ingredients.
- Application: Liquid cleaners can be trickier to apply and wipe off, but you can’t go wrong with a spray product.
- Compatibility: Some leather cleaners are limited to use with certain textures and colours. Ensure your cleaner matches your leather type and colour.
- Fragrance: While fragranced cleaners may smell pleasant, the parabens in these products can cause your leather seats to degrade faster.
- Leather age: Old leather is more challenging to clean than new leather because of cracks, flaking, and other potential issues. Ensure that your product is fit for use with new and old leather.
Closing Thoughts
While cleaning leather car seats may seem complex, it becomes second nature once you get the hang of it and with the right practice can become second when it comes to owning a car. With the right cleaning solution and method, you can keep your leather seats in pristine condition for longer.


